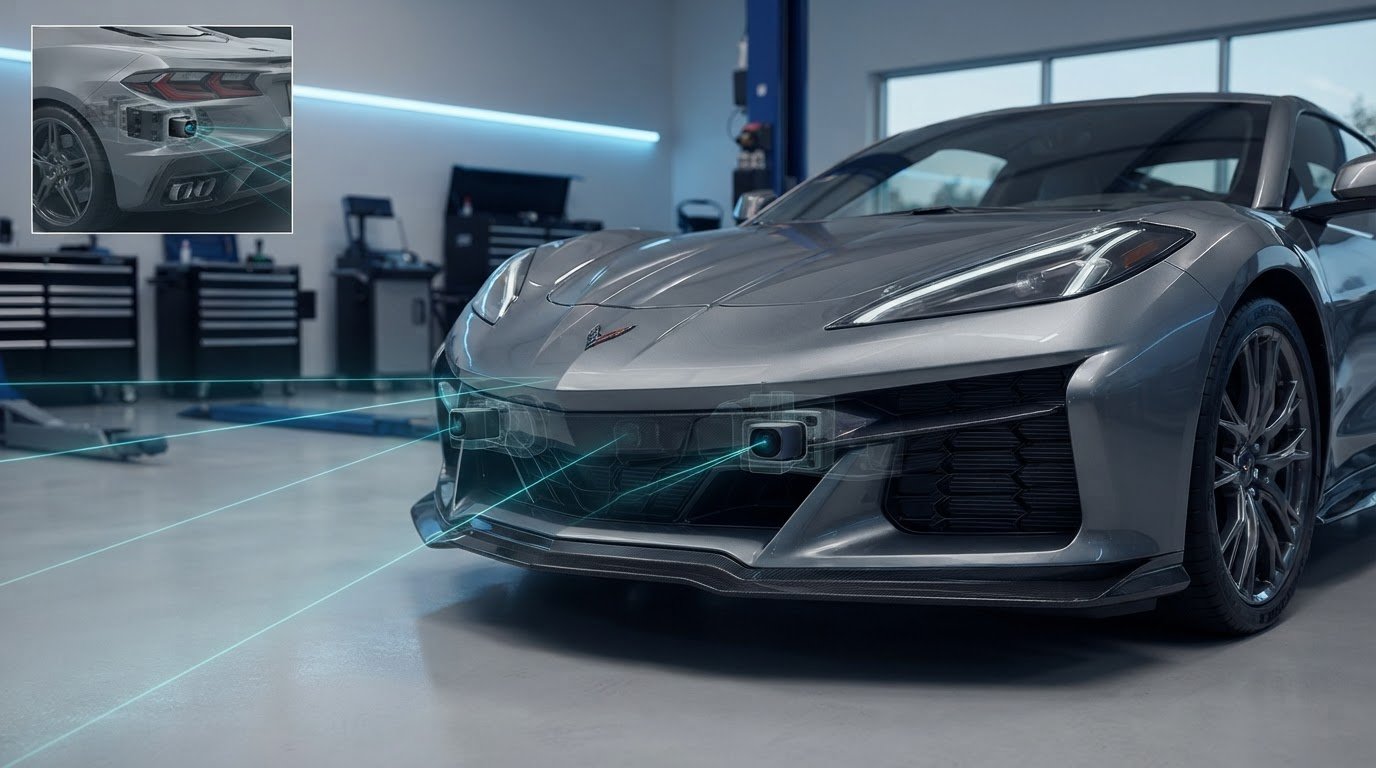
Placement comes down to sensor height, separation, and a clear view through the bumper. Getting front bumper laser sensor placement for Corvette C8 right starts with identifying the sensor type and evaluating the available mounting area. One C8 owner reported a practical TX position about 16 inches above the ground, while cited ALP directions specify at least 20 inches for the older green/blue TX sensor. They also recommend placing an additional RX sensor at least 7-10 inches below a TX sensor.
These examples describe different setups, not a universal mounting point. The reported TX position and the minimum height for an older sensor are not interchangeable. A location can look tidy yet still obstruct the sensor’s view with grille bars, trim, or nearby hardware.
This guide explores front bumper laser sensor placement for Corvette C8 setups through RX and TX examples, rear mounting constraints, and possible interference points. It explains how to assess front bumper laser sensor placement for Corvette C8 installations by considering sensor type, sightline, and the available space, so you can better evaluate a layout for your car.
Key Takeaways
- Choose front RX positions around clear sensor sightlines, and assess how the bumper’s openings and surrounding trim affect placement.
- Evaluate TX height separately from RX positioning; the older green/blue TX guidance and a C8 owner’s placement example describe different setups.
- Plan the rear layout around the C8’s tighter mounting space; a compact arrangement can differ substantially from the front configuration.
- Compare model-year and trim details against the actual bumper layout rather than assuming one mounting position fits every C8.
Front RX sensor locations
For front bumper laser sensor placement on a Corvette C8, prioritize an unobstructed forward view. An RX head detects incoming laser signals, so grille bars, trim, and a recessed mounting position can block its view. A reported placement guideline describes each RX head as covering roughly a 24-inch radius in all directions; treat that as a planning reference, not a guarantee of coverage.
In one C8 example, the owner planned two front RX sensors with one TX sensor. The action was to position the RX heads across the front, then check their sightlines against the bumper openings. The result was a defined two-head layout, not a published performance test. For an additional RX head, the cited ALP directions recommend placing it at least 7-10 inches below a TX sensor.
There is no universal replacement cost for the placements described here. The cost depends on whether only the RX head needs replacing or its mount or wiring is also damaged, along with parts and labor.
To remove and reinstall an RX sensor, access its mount, disconnect the wiring without pulling the cable, and remove the fasteners. Reinstall the sensor in the same orientation, secure the mount, reconnect the wiring, and check that nothing obstructs its forward view.
Replacing a bumper can shift the RX head or change its mounting angle, so check its position and system operation afterward. These examples do not establish a factory calibration requirement for a jammer RX head.
Alignment requires a stable mounting point and a clear view ahead. Park on level ground and compare the left and right head positions. These examples do not identify a specific calibration device.
Damage or misalignment may show up as a loose head, a visibly changed angle, damaged wiring, or inconsistent system alerts. Switch off the jammer before handling connectors, avoid forcing clips, and keep the RX aperture clear. US owners seeking alignment can use an installer familiar with their laser-jammer system. This is different from factory vehicle-sensor calibration.
Front TX sensor height and placement
A C8 owner reported a practical front TX mounting position about 16 inches above the ground. That is an owner’s example, not a universal height for every C8 bumper. The cited ALP directions specify at least 20 inches above ground for the older green/blue TX sensor. Treat these figures as distinct setup references, not interchangeable instructions.
Physical sensor dimensions and mounting height answer different questions. The sensor’s body must fit the chosen opening, while its active face needs a clear forward view. A grille bar, recessed pocket, or angled bracket can obstruct or redirect that view. The reported C8 example establishes a possible height, but gives no physical sensor measurements.
Consider the model before choosing the mounting point. The green/blue TX sensor was replaced by the TX Black in 2021, according to a forum member. That change makes it important to identify the sensor in hand before applying older placement directions. Don’t transfer the older sensor’s minimum height automatically to a different model.
Use this sequence to assess a front TX position:
- Identify the TX sensor model and its mounting face.
- Measure the proposed height from the ground, keeping the reference consistent.
- Check the sensor’s forward view through the bumper opening.
- Inspect the bracket for tilt, looseness, or contact with surrounding trim.
In the C8 owner’s example, the action was to locate a practical position around 16 inches high; the result was a workable mounting reference for that car. By contrast, the older green/blue directions set a 20-inch minimum. The mounting position therefore depends on sensor type and unobstructed alignment, not appearance alone. For component replacement, laser jammer components are relevant when the existing TX hardware needs attention.

Front and rear sensor configurations
The configurations discussed here use aftermarket laser-jammer RX and TX heads, not factory Corvette controls. An RX head detects incoming laser, while a TX head transmits the jammer response. Neither controls steering or braking.
A C8 owner planned two RX heads and one TX head at the front, then two RX heads at the rear. The situation was a car with limited rear mounting space. The action was to allocate more heads across the front and reserve two RX positions behind. The result was a planned layout, not a reported test outcome.
Rear space shapes the choices. The owner described only 6 inches of usable mounting room inward from either side. The area above the rear license plate measured 24 inches wide. Those dimensions make precise positioning important: check that each head faces outward, stays unobstructed, and fits without contacting nearby trim.
A separate reported rear example used 1 RX and 1 TX head, with the installer reporting excellent test results. That case shows a compact alternative, not a guaranteed outcome for every C8. The vehicle’s available mounting points and clear sightlines determine whether a similar arrangement fits.
RX and TX heads need physical separation. The discussion specifies at least seven inches between them. Use that as a layout constraint, then confirm each head’s orientation and clear view before securing the mounts.
- Front example: Place two RX heads and one TX head across suitable openings.
- Rear example: Assess the narrow side mounting areas before choosing head positions.
- Final check: Confirm separation, stable mounts, and clear paths for each head.
For the C8 owner’s planned configuration, the action was to map both bumpers before installation. The result was a front-heavy layout with rear RX coverage, adapted to the available space. Treat front and rear as separate placement problems: bumper geometry, head direction, and the seven-inch separation rule all influence the final arrangement.
Which Corvette C8 model years and trims have front bumper laser sensors?
The examples here describe aftermarket laser-jammer sensors fitted to a Corvette C8, not a factory feature tied to a specific trim. A model-year badge or trim name alone therefore doesn’t establish whether a front RX or TX head is installed. Inspect the bumper and equipment itself before planning a replacement or new layout.
One C8 owner described a planned setup with two front RX heads and one front TX head. The situation was a car being equipped with a separate jammer system. The action was to map available bumper positions for each head. The result was a proposed arrangement, not evidence that every C8 year or trim comes with those sensors.
Sensor hardware can also change independently of Corvette model years. A forum member said the older green/blue TX sensor was replaced by the TX Black in 2021. That date refers to the sensor change, not a C8 trim change. For a car with existing hardware, identify the head model before applying placement directions or selecting a replacement part.
Use these checks to identify what’s on a particular C8:
- Inspect the front bumper for separate jammer heads and their mounts.
- Identify each head as RX or TX before assessing its position.
- Record the sensor model, especially when comparing it with directions for the older green/blue TX.
- Check both sides of the bumper for added hardware, wiring, and unobstructed openings.
For example, if a C8 has no visible jammer heads, its trim name doesn’t provide a mounting map. If it has a TX Black, directions for the older green/blue sensor may not describe that hardware. This equipment-first approach avoids confusing a Corvette production detail with an aftermarket installation choice. Owners replacing a head can explore sensor hardware suited to their setup.
AL Priority USA: AL Priority System
AL Priority USA offers the AL Priority System for drivers assessing a laser-jammer setup for their Corvette C8. Established in 2013, AL Priority is the #1-rated laser jammer available and has ranked annually as the market’s best-performing system. That track record makes it a focused option when you’re choosing equipment around front and rear sensor placement.
For an existing setup, Laser Jammer Parts and System Accessories can support your component needs as you plan the configuration. Match parts to the intended sensor layout, accounting for the distinct roles of RX and TX heads. Knowing the bumper’s available mounting positions can help guide your system choice.
Visit AL Priority USA to explore the system and related equipment.
Make the next placement decision with confidence
Use your C8’s actual bumper as the reference point for any future adjustment. Before changing hardware, note each head’s position and orientation, then compare the sightline after the work. This gives you a practical baseline and helps distinguish a mounting change from a sensor issue.
A fresh review is especially useful after bumper repairs, trim changes, or work that affects a sensor bracket. Look for a secure mount, an unobstructed forward view, and wiring that remains properly routed. These checks keep the installation decision grounded in the car in front of you, rather than assumptions based on another C8’s setup.
Thoughtful front bumper laser sensor placement for a Corvette C8 is an ongoing fitment decision, not just a choice made during the first installation. Keep your notes with the vehicle’s service records so future adjustments start with a clear reference.
For help choosing the next step for your setup, contact AL Priority USA. You’re well equipped to make a more informed decision.
Frequently Asked Questions
C8 Corvette AL Priority Installation Evaluation…?
An AL Priority installation evaluation examines the existing system and how the C8’s bumper affects sensor operation. Identify the fitted head types, then inspect their mounts and cable routing, especially after bumper work. Compare the current setup with any installation photos or notes, and look for shifted hardware or damaged wiring. These checks help pinpoint changes that could affect the system.
Where is the laser sensor located in the Corvette C8 front bumper?
A C8 front laser-jammer sensor may be mounted behind a grille opening or another clear section of the front bumper. It isn’t a single factory-defined position shared by every car. To locate one, inspect the bumper for small, separately mounted heads and follow their wiring. The actual position depends on the vehicle’s equipment and chosen mounting points, so check the car itself.
Can aftermarket or repaired C8 front bumpers interfere with the laser sensor?
Yes. A replacement or repaired bumper can affect a sensor if an opening, bracket, finish, or trim blocks its forward view or changes its angle. Compare the current position with pre-repair photos, and look for shifted brackets or pinched wiring. Then check system operation using its normal controls. A smooth exterior finish alone does not confirm that the sensor has a clear view.
What tools and calibration equipment are needed for C8 laser sensor alignment?
Park on level ground, compare the left and right head positions, and check for a clear forward view. No specific calibration device is identified.
Leave a Reply