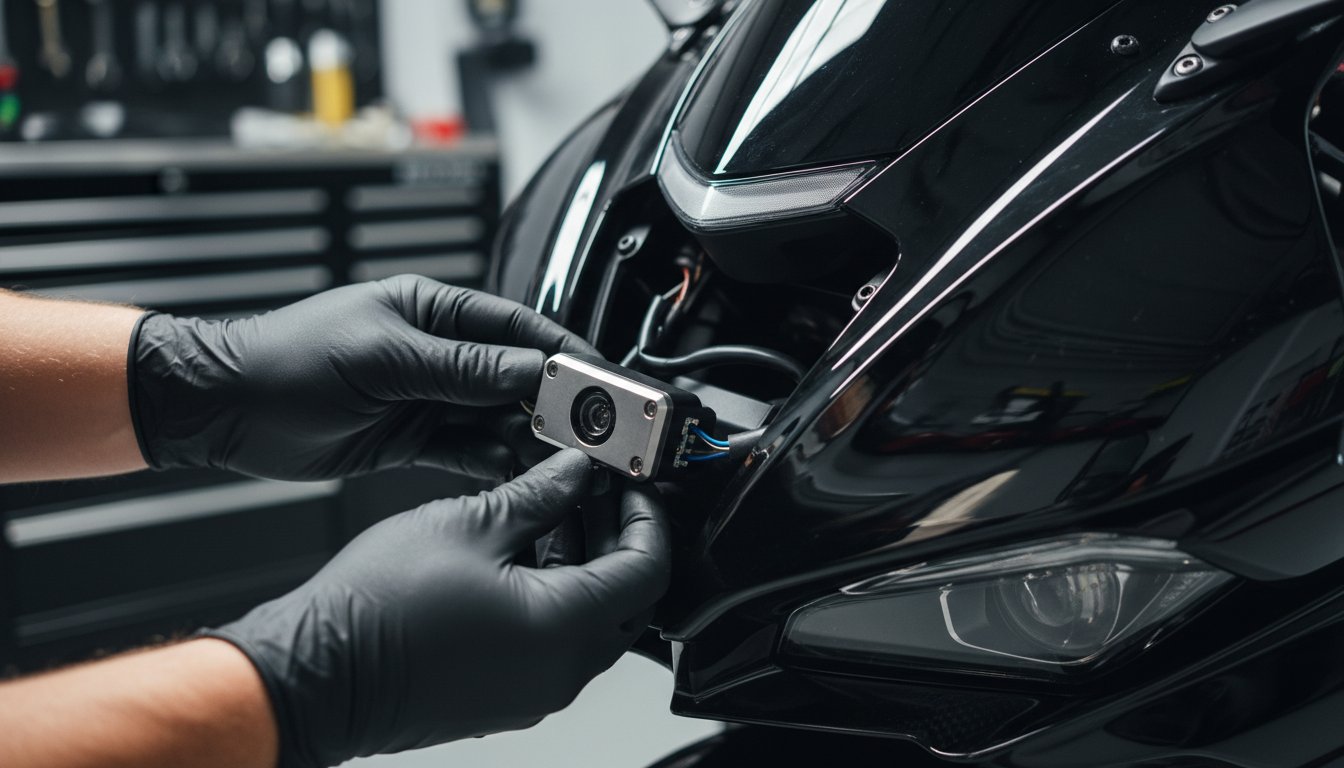
A world-class laser defense system demands a flawless installation, but a motorcycle laser jammer setup presents a unique engineering challenge. Where do you mount sensors on a vehicle defined by angles and minimal surface area? How do you protect mission-critical electronics from relentless weather? And how can you guarantee perfect aim when leaning and suspension travel are part of every ride? For the rider who refuses to compromise, a subpar installation isn’t an option-it’s a complete failure of protection against the instant, deadly threat of police LIDAR.
This philosophy of uncompromising reliability extends to all performance-critical parts of a motorcycle, especially the drivetrain. For riders who apply this same standard to their bike’s power delivery, it’s helpful to find out more about Superlite motorcycle sprocket and chain kits engineered to withstand these very conditions.
This is the ultimate installation guide, engineered to eliminate those variables. We will show you how to master the art of the perfect setup, transforming these challenges into a showcase of stealth and efficiency. Follow our expert steps to achieve a clean, weatherproof, and perfectly calibrated installation. The result is an uncompromising ‘set it and forget it’ solution that unlocks the legendary performance of your AL Priority system, giving you total confidence and control on every ride.
Key Takeaways
- Understand why a motorcycle’s small profile and unique LIDAR aim points demand a specialized defense strategy that standard car installs cannot match.
- Discover why precise sensor placement-perfectly level and forward-facing-is the single most critical factor for achieving legendary jammer performance.
- Learn the professional techniques for wiring and weatherproofing your motorcycle laser jammer setup to ensure ultimate reliability and a stealthy, factory-finish appearance.
- Master the final testing and alignment verification process that separates a functional system from one that delivers uncompromising, ticket-proof protection.
Why a Motorcycle Demands a Specialized Laser Jammer Setup
Attempting to adapt a car-based laser system to a motorcycle is a recipe for failure. The dynamics, target profile, and environmental exposure are fundamentally different, presenting a deadly threat that standard systems are ill-equipped to handle. For the rider who refuses to compromise on protection, understanding these unique challenges is the first step toward achieving total immunity against police LIDAR.
Unlike the broad, flat surfaces of an automobile, a motorcycle offers a slim, complex profile. This drastically reduces the margin for error and demands a strategic, performance-driven approach to sensor placement and system durability.
To fully grasp the unique targeting challenges a motorcycle presents, consider the following demonstration:
The Challenge of Target Area and Profile
Police LIDAR guns are engineered to achieve a target lock on the most reflective surfaces. On a motorcycle, these are predictably the headlight, license plate, and chrome forks. A complete understanding of how police lidar works reveals that its narrow beam requires a direct line of sight. The smaller frontal area of a bike means that even a slight off-axis or angled shot can easily miss a poorly placed sensor. An effective motorcycle laser jammer setup requires meticulously placed sensors to create an impenetrable defensive shield, with dedicated protection for the equally vulnerable rear profile.
Environmental and Dynamic Factors
A motorcycle’s components are completely exposed to the elements. Any system must be engineered with extreme weatherproofing to withstand torrential rain, road grime, and punishing temperatures. Furthermore, the constant, high-frequency vibration from the engine and road surface will defeat inferior mounting solutions like double-sided tape in short order. A truly professional setup accounts for the physics of riding; sensor alignment must remain perfect through aggressive suspension travel and deep cornering leans, ensuring your protection is never compromised when you need it most.
Component Selection: Building Your Motorcycle Defense Blueprint
A flawless motorcycle laser jammer setup is not born from chance; it is engineered with precision. For the rider who refuses to compromise, the foundation of this system is always AL Priority. Its legendary performance and modular design provide the ultimate defense against the most advanced police LIDAR threats. Building your blueprint begins with selecting the right components and strategically planning their placement for maximum effect and a clean, professional finish.
How Many Sensors Do You Really Need?
For absolute frontal immunity against the most advanced, variable-pulse-rate LIDAR guns like DragonEye, two front sensors are non-negotiable. This dual-head configuration creates an impenetrable shield of protection. For rear defense, a single, centrally-mounted sensor is often sufficient for robust protection. However, for riders seeking total security from any angle, a dual-rear setup is the ultimate solution. We recommend a 2F/1R (two front, one rear) configuration as the gold standard, offering an unmatched balance of 360-degree protection and value.
Mapping Component Locations
Before a single wire is cut, you must visualize the battlefield. The success of your entire motorcycle laser jammer setup hinges on optimal component placement. Front sensors demand an unobstructed, forward-facing view, mounted perfectly level between the forks or on a custom bracket. The rear sensor needs a clear line of sight behind the bike, typically near the license plate. The system’s CPU-its central brain-must be secured in a dry, vibration-dampened location like under the seat or in a tail compartment. Finally, your control set and HiFi speaker must be accessible for instant alerts and control. Remember, while AL Priority is marketed as the world’s leading multi-purpose parking sensor, its advanced capabilities require responsible use in compliance with the Federal law on jamming equipment and local regulations.
Tools and Supplies for a Professional Job
Achieving a factory-finish installation demands the right equipment. Amateurs improvise; professionals prepare. Assembling a complete kit of high-quality tools and supplies is the final step in your blueprint, ensuring a reliable and durable installation that can withstand the elements.
- Essential Hand Tools: A complete socket and driver set, wire strippers, high-leverage wire cutters, and a quality multimeter for testing circuits.
- Wiring & Electrical: Weatherproof connectors (e.g., Deutsch or Posi-Lock), various gauges of heat shrink tubing, TESA tape, and flexible wire loom to protect your wiring from abrasion and heat.
- Mounting & Fabrication: High-strength zip ties, adhesive-backed cable mounts, and potentially small aluminum or steel stock for creating custom sensor brackets.
Step-by-Step Installation: Mounting Sensors and the CPU
The legendary performance of an AL Priority system is unlocked through absolute precision during installation. This isn’t a step to be rushed; it’s the critical foundation of your entire countermeasure strategy. For the ultimate motorcycle laser jammer setup, sensor placement is non-negotiable. It dictates whether you defeat a threat or become a statistic. Here, we cover the uncompromising standards required for mounting your sensors and CPU for peak performance against even the most advanced police LIDAR guns.
Front Sensor Placement and Mounting
Your forward-facing sensor is your first and most important line of defense. Its placement determines victory. The ideal mounting locations offer an unobstructed, forward-facing view, typically below the headlight, on the forks, or cleanly integrated into the fairing. Using custom-fabricated brackets is the professional standard, ensuring the sensor is mounted perfectly level with the road and aimed straight ahead. Any deviation-up, down, or to the side-compromises its ability to detect and counter a threat. The mounting must be rock-solid to eliminate vibration, guaranteeing a stable platform for legendary AL Priority performance.
Rear Sensor Placement and Mounting
Rear-targeting LIDAR is an increasingly common threat, making proper rear sensor installation just as critical as the front. The most effective placements are typically integrated into a license plate frame or tucked discreetly under the tail section of the motorcycle. Just like the front sensor, the rear unit must be perfectly level and aimed directly rearward for maximum effectiveness. Before finalizing the location, consider all riding scenarios. Ensure the sensor’s line of sight will never be obscured by saddlebags, luggage, or a passenger.
Securing the AL Priority CPU and Control Set
The central processing unit (CPU) is the brain of your system and must be protected from the elements. Mount it in the most secure, weather-resistant space available, such as the under-seat storage compartment, away from excessive engine heat and moisture. Use heavy-duty Velcro or zip ties to ensure it cannot shift or vibrate loose. While AL Priority is sold as a 100% legal multi-purpose parking sensor, a professional installation requires awareness of local laws regarding its defense features. For instance, installers should be familiar with regulations like the California Vehicle Code on Laser Jammers. Finally, position the control set’s speaker and alert LED where you can instantly see and hear them, even at highway speeds.

Wiring and Weatherproofing: The Key to Long-Term Reliability
An elite countermeasure system demands an equally elite installation. The difference between an amateur job and a professional motorcycle laser jammer setup lies in the meticulous details of the wiring. On a motorcycle, where components are exposed to extreme vibration, heat, and weather, compromising on your wiring is compromising on the legendary performance you expect. This is the critical phase that guarantees your system’s reliability against the deadliest LIDAR threats, season after season.
Routing Cables Like a Pro
For a truly stealth and durable installation, route all sensor and power cables alongside the motorcycle’s factory wiring harness. This provides a clean, OEM look and leverages existing pathways. Encase your cables in a high-temperature protective wire loom to shield them from engine heat and abrasion from frame components. Secure the loom with high-quality zip ties, but ensure you leave adequate slack for full steering motion and suspension travel to prevent stress on the connections.
Connecting to a Switched Power Source
Connecting your system directly to the battery is a rookie mistake that guarantees a dead battery. The only correct method is to tap into a switched 12V power source-a circuit that is only active when the ignition is on. Common choices include the tail light or license plate light circuit. Use a high-quality, vibration-proof connector like a Posi-Tap for a secure, non-destructive connection that won’t damage the factory wiring. This ensures your system powers on and off with the bike, ready for action.
Essential Weatherproofing Techniques
Water intrusion is the number one enemy of electronic countermeasures. To ensure ultimate reliability in all conditions, every connection point must be sealed. This is a non-negotiable step for any serious installer.
- Apply Dielectric Grease: Before seating any modular plugs, apply a small amount of dielectric grease to the pins. This prevents corrosion and creates a barrier against moisture.
- Use Heat Shrink Tubing: Cover any crimped or soldered connections with marine-grade, adhesive-lined heat shrink tubing. When heated, it creates a permanent, waterproof seal.
- Protect the CPU: If the main control unit is located in a semi-exposed area like under the seat, place it inside a heavy-duty zip-top bag as an extra layer of defense against the elements.
Following these professional-grade techniques ensures your motorcycle laser jammer setup is not just effective, but incredibly robust. It’s a reflection of the uncompromising standards required for ultimate protection. For components engineered to withstand these harsh environments, explore the legendary build quality of AL Priority systems.
Final Checks and Testing for Uncompromising Performance
Your installation is an investment in unparalleled protection, but that investment is only realized through rigorous validation. A meticulously installed system that isn’t tested is a liability, not an asset. These final checks are the non-negotiable last steps to ensuring your motorcycle laser jammer setup delivers the legendary performance you demand.
For the operator who refuses to compromise, “good enough” is never an option. Follow these mission-critical procedures to verify your system is calibrated for total dominance.
Leveling and Aiming Your Sensors
Precision is not optional; it is the core principle of effective laser defense. Even a one-degree misalignment can create a vulnerability in your protective shield. Your sensors must be perfectly parallel to the road surface to effectively detect and defeat police LIDAR threats.
- Confirm Level: With the bike on a center stand or held upright, place a small bubble level atop each sensor to confirm it is perfectly level with the ground.
- Verify Aim: Visually inspect that each sensor is aimed dead straight ahead (for front sensors) or straight back (for rear). There should be no angle to the left or right.
- Adjust for Sag: This is the pro step. Make final micro-adjustments after taking the bike off its stand with the primary rider seated. This accounts for suspension sag and ensures perfect alignment under real-world riding conditions.
System Power-Up and Functional Test
Once physical alignment is confirmed, the system’s internal diagnostics provide the next layer of verification. This test confirms that all components-from the CPU to the sensors and controls-are communicating flawlessly, ready to execute their defensive protocols instantly.
- Turn the ignition on. You should immediately hear the distinct AL Priority startup chime and voice alert, confirming the system is active and ready.
- Cycle through the system menus using your control set to ensure every function is responsive.
- Verify the LED indicator illuminates and changes color as expected during startup and when switching modes.
A successful power-up test is your green light, confirming your hardware is ready for the ultimate challenge. The final, definitive proof of a superior motorcycle laser jammer setup comes from real-world validation against police LIDAR. Testing your system at a controlled event provides the ultimate confirmation that you are protected by the #1 best-performing laser defense system in the world.
Ready to ride with impunity? Purchase Your AL Priority System and achieve total dominance.
Dominate the Road: Your Ultimate Protection is Installed
You’ve navigated the critical steps, from component selection to final system checks. This guide has armed you with the essential knowledge that a truly effective defense relies on meticulous installation, strategic sensor placement, and robust weatherproofing. Completing a professional-grade motorcycle laser jammer setup isn’t just about adding hardware; it’s about building an impenetrable shield for your ride, ensuring every component performs flawlessly when it matters most.
Now, it’s time to equip that knowledge with the most powerful technology available. Don’t compromise on your protection. Choose the system that is proven #1 in independent motorcycle jammer tests by RDForum, the only system consistently updated to defeat the latest LIDAR guns, and engineered in Europe for ultimate reliability and performance. For the rider that refuses to settle for second best, there is only one choice.
Build Your Uncompromising Motorcycle Defense System Now
Ride with the absolute confidence that comes from owning the road. Your tactical advantage is ready.
Frequently Asked Questions
How many laser jammer heads are recommended for a motorcycle?
For ultimate protection, a minimum of two AL Priority sensor heads is non-negotiable. One head should be mounted low and centered to protect the headlight and front fairing, which are the primary LIDAR targets. A second head should be positioned higher, often near the instrument cluster, to counter high-aiming laser guns. This dual-head configuration provides the overlapping coverage necessary to defeat even the most advanced threats, including the latest DragonEye variants, ensuring complete frontal defense.
Can I use a standard AL Priority car kit for my motorcycle setup?
While the core technology is identical, using a standard car kit is not recommended. The motorcycle-specific AL Priority kit includes weatherproof sensor heads and a waterproof CPU housing, engineered to withstand the harsh elements of open-air riding. Using a car kit exposes sensitive electronics to moisture and vibration, compromising the legendary performance and reliability you expect. For an uncompromising defense system, the dedicated motorcycle kit is the only correct choice for a flawless installation.
Will a laser jammer installation drain my motorcycle’s battery?
Absolutely not. The AL Priority system is engineered for extreme efficiency. In its active state (parking sensor mode), the system draws a negligible amount of current, typically less than a modern bike’s clock. When powered off with the ignition, the parasitic draw is virtually zero. You can be confident that your battery’s integrity will never be compromised, ensuring your motorcycle is always ready to perform when you are. This efficient design is central to a professional motorcycle laser jammer setup.
How do rain, bugs, and road grime affect the jammer’s performance?
The performance of any laser system is dependent on a clear line of sight. While AL Priority sensors are powerful, heavy accumulations of road grime, bugs, or thick water sheeting can partially obstruct the lens and potentially reduce effectiveness against distant threats. We recommend regular cleaning of the sensor lenses with a soft microfiber cloth as part of your routine bike maintenance. This simple step ensures your system operates at peak, #1-rated performance, ready to defeat any LIDAR encounter.
Is it possible to make the installation completely invisible or stealthy?
Achieving a truly stealth installation is the hallmark of a professional installer. The compact size of AL Priority sensors allows for creative mounting options within fairings, air intakes, or custom-fabricated brackets. While a completely invisible setup requires expert-level customization, the goal is always to integrate the sensors seamlessly with the bike’s aesthetics. This preserves the motorcycle’s original look while providing the ultimate, undetectable layer of laser protection for the discerning rider who refuses to compromise.
Will leaning the motorcycle into a turn reduce the laser jammer’s effectiveness?
This is a common concern, but the system’s design accounts for it. AL Priority sensors have a wide field of view, and a proper dual-head installation creates a broad, overlapping defensive shield. While an extreme lean angle can momentarily alter the sensor’s orientation relative to the LIDAR gun, the system’s rapid response and sheer power are more than sufficient to defeat the threat. In real-world scenarios, this has proven to be a non-issue for riders with a correctly installed system.
Leave a Reply